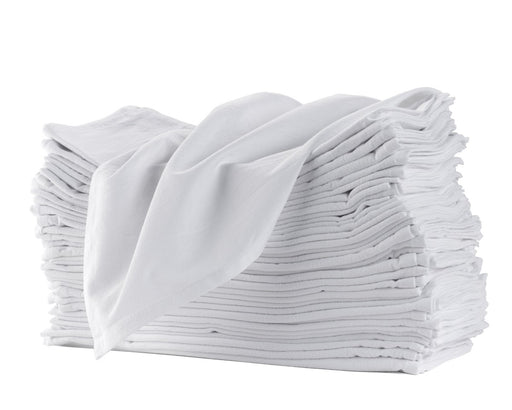
Continental U.S. only.
Continental U.S. only.
Throughout history, humble cotton flour sacks have served far beyond their original purpose, becoming a canvas for creativity and resourcefulness. From clothing and home textiles to unique DIY projects, these simple pieces of fabric were transformed into essential household items, reflecting a spirit of ingenuity and thrift that continues to inspire us today.

During the days of austerity when nothing was ever wasted that could have future use, flour sacks were as important a part of daily living as they were for flour storage.
Imagine how useful flour sacks were in the 1930's when they were printed with patterns colorful enough to be used for clothing. In those days, you might see women sewing those ruffled sleep caps from flour sacks to keep their hair neat while they slept.
SHOP FLOUR SACK TOWELS NOW
They were also used for pillow ticking and pillowcases. Though these were a great way to save money during the Great Depression Era, flour sacks have proven their place in time.
Today, the flour sack is emerging once more as flour sack placemats, flour sack towels, and flour sack dish towels. These add a certain rustic charm to country kitchens. There is a wealth of craft ideas that make good use of flour sacks.
No avid fan of grilling and barbecuing can do without a flour sack barbecue apron. These are relatively easy to make. Borrow a trick from the proficient seamstresses of the Great Depression and use old newspapers to trace barbecue apron patterns.

Using a dark marker, draw one rectangle about eighteen inches long and waist width wide. For example, if the chief barbecue chef has a frontal waist 30" wide from side to side, the first rectangle needs to be this approximate size.
This section of fabric will be sewn to a second rectangle about eight inches long and eight inches wide, depending on hip to hip size. The second rectangle should be longer in width than the first.
To make apron strings, simply measure the length required to fit the second rectangle from hip to hip with about eight inches extra to tie a knot. Draw a shorter string to attach to the top of the first rectangle to slip over the head. Then, pin flour sack fabric to the pattern and cut with pinking shears. Sew the two rectangles together, adding the apron strings and neck string. Sew a matching "chef's hat" to complete the ensemble.
The kitchen cook always has a need for an apron. Flour sack aprons are simple and easy to make. These can be made in flat panels or with a bit of ruffling. Use flour sacks to make a large flat fabric panel and attach two apron strings. For a ruffled effect, cut a single waistband about two inches wide and long enough to tie around the wait. Then, pin the flour sack material at the top into small 1/8" pleats. Place the waistband over the pleated flour sack and pin at the center. Remove all other pins and sew the waistband from left to right, removing the center pin.
Every kitchen has small appliances that need to be protected from dust even when they are stored in kitchen cabinets. This is also true of countertop appliances that are not stored for ready use.

Flour sack covers for these are easy to make because there are no more than three or four fabric pieces needed to make them. Flour sack covers for electric mixers, coffee makers, toasters, and blenders are attractive and take less than a half hour to make. Taking measurements of these appliances is essential in order to cut flour sack fabric to accurate size and shape.

Another popular way to use flour sacks is for chair pads. These are also fun to make since they require only two round, square or oval pieces of flour sack fabric cut to fit specific seat size. Save all flour sack scraps to use as decorative ruffles and also to attach the finish flour sack chair pads to the rungs of the chair.
This is a really fun project that can be hand sewn or sewn by machine, depending on personal preference. Be sure to measure your washer and dryer machine sizes.
In addition to flour sack fabric, a light under padding is also needed. Select several large pieces of flour sack fabric. Cut them into 12" x 12" squares. Sew these together. To create the "quilted look," sew under padding to the reverse side of flour sack squares.
Use a sewing machine or manually sew the top flour sack fabric with small tight stitches in diamond patterns to make the flour sack fabric "puffy."
Shopping is always fun until all of the plastic shopping bags begin to pile up and need to be recycled. The answer is as simple as making your own reusable, washable flour sack shopping bags. Make them in small, medium and large sizes so they are most useful. All that is required is two rectangular sections of flour sack fabric and one bottom section.
What could be cooler in hot weather than a flour sack sarong? Since sarongs are all one piece, flour sacks can be tie-dyed or iron on bright floral appliqués to the fabric. Use flour sack scraps to make "flowers" to accessorize the sarong. Flour sack beach cover-ups are another addition to a flour sack wardrobe.
During the Great Depression, women loved to make their "drawstring" handbags from flour sacks. This is another very easy project to make. Cut the flour sack fabric in a large circle to the size of the handbag you prefer. Simply sew a hem and add a drawstring made from fabric scraps.
Flour sacks also make great cosmetic bags. For these smaller bags, cut two flour sack panels about six inches by six inches. Sew narrow hems on all four sides of the fabric. Then, sew two bottom hems together and add a zipper to the top two hems.
Save your old bits of jewelry to attach to flour sack "ribbons" to make charming head and neck bands. Cut one half inch flour sacks long enough to fit around the head or neck and if desired, sew two narrow hems.

Then, sew or glue beads or attach a small jeweled pin to the center. The neckband can be tied or hooks and eyes can be sewn on. To make a dangling flour sack neckband, use orphaned bits of bracelets or chandelier earrings to attach to the center of the band.
To give a kitchen really rustic look, use flour sacks to make Cape Cod style curtains, swags with bottom panels or draped swags over sheer panels. Flour sack kitchen curtains are a simple matter of sewing hems to the fabric. These add a "farmhouse" appeal to a rustic style kitchen.
Even bathroom windows get a charming, rustic look with flour sack curtains. These are usually 36 or 45 inches in length and 36" inches in width. So, all that is necessary is to sew hems for rod style curtains. To make them a bit fancy, sew curtain rings to the top hems. These can also be dyed, pleated or swagged as preferred.
Lampshades are quite easy to make from flour sacks. In most cases, flour sack fabric can be pleated for this purpose. To do this pin pleats over an old lampshade or remove the older shade and reserve the metal frame. Leave at least a one-eighth inch overlap on the top and bottom edges of the fabric.
After pleating and pinning, simply use fabric glue to glue the fabric to the older lampshade or to the overlapping fabric on the metal frame.
If you can imagine it, you can use flour sacks to create fun works of art. In fact, the really creative crafter rolls flour sacks tightly and turns these into picture frames.
To make fun works of art with flour sacks, dye them in coordinating colors. Cut them into triangles, squares, crescents, and circles. Some crafters plan ahead with a sketch of the proposed flour sack art as a guide.
Use fabric glue to glue these shapes to white or ecru flour sack backing. Start the artwork from the center and work the shapes outward. Some crafters like to allow the shapes to overlap.
Every child has a favorite rag toy. For some, it may be a doll or a bear. For others, it might be a scary dragon. Save old nylon pantyhose and some of that shredder paper.
Cut the legs from pantyhose and stuff them with shredded paper bits. Make sure the paper is tightly packed. Tie off the midsection and knot the open leg edge.
Use flour sack fabric to cover the two sections of the stuffed leg. To make hair, use flour sack scraps and attached to the nylon top knot. Add shoe button eyes and a flour sack hat. Flour sack scraps can also be used to make ears and noses.
To make limbs for a doll or bear, cut the remaining pantyhose leg into short three or four-inch sections. Stuff with shredded paper and cover with flour sack fabric. Attach to the body.
Keep a flour sack bag in the car to organize kids’ toys on long trips or use one as a traveler’s laundry bag. Use flour sacks to recover footstools and worn fabric seats on chairs and cover a multitude of flaws.
Who knew there could be so many uses of flour sacks?

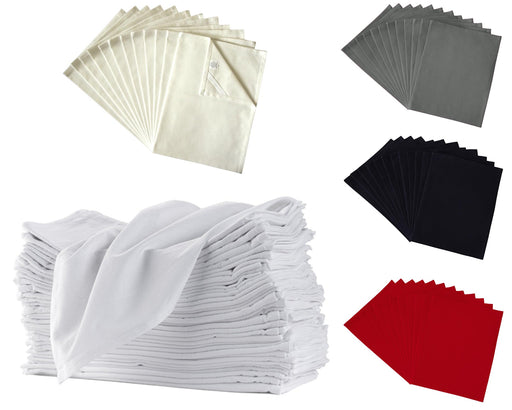
If you need red, gray, blue or black color please click here. ★ Multipurpose, available white or natural colors (unbleached), matching, wholesale ...
View full details
Custom Printed Flour Sack Towels ★ Current Production Time: 3–4 Weeks WHOLESALE | RESELLERS | DESIGNERS ✅ Everyone is welcome to order! If you'r...
View full details
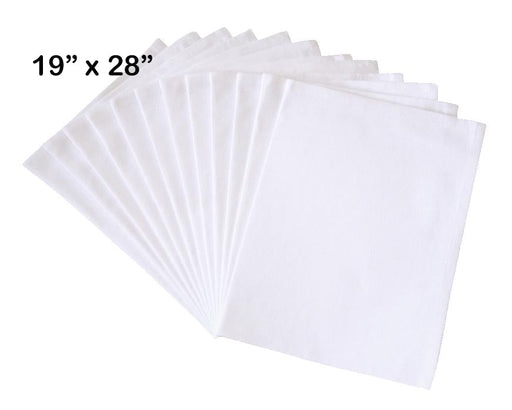
100% Cotton, comes in white (bleached) and natural (unbleached) color A uniform 19" x 28" rectangle, 130 thread count, flour sack napkins hemmed...
View full details
100% Cotton A uniform 27" x 27" square, 130 thread count, 3 oz each heavyweight flour sack dish towels and hemmed on all sides A corner loop for...
View full details
Attention Re-sellers, Wholesalers, and Designers: If you need to order more than 100 pieces, please contact us for our special wholesale pri...
View full details